Your Cart is Empty
"It doesn't even feel like I am wearing a pack!"
Aarn Balance Packs are highly adjustable enabling you to dial in the perfect fit to a degree not possible with other brands. This will most likely mean that for the first day or two you will need to experiment with the different adjustments and understand what each adjustment does in order to achieve the best fit. General fitting instructions for the larger packs are below. Video instructions for specific models are shown on the model page.

1. Choose the appropriate size pack for your back length.
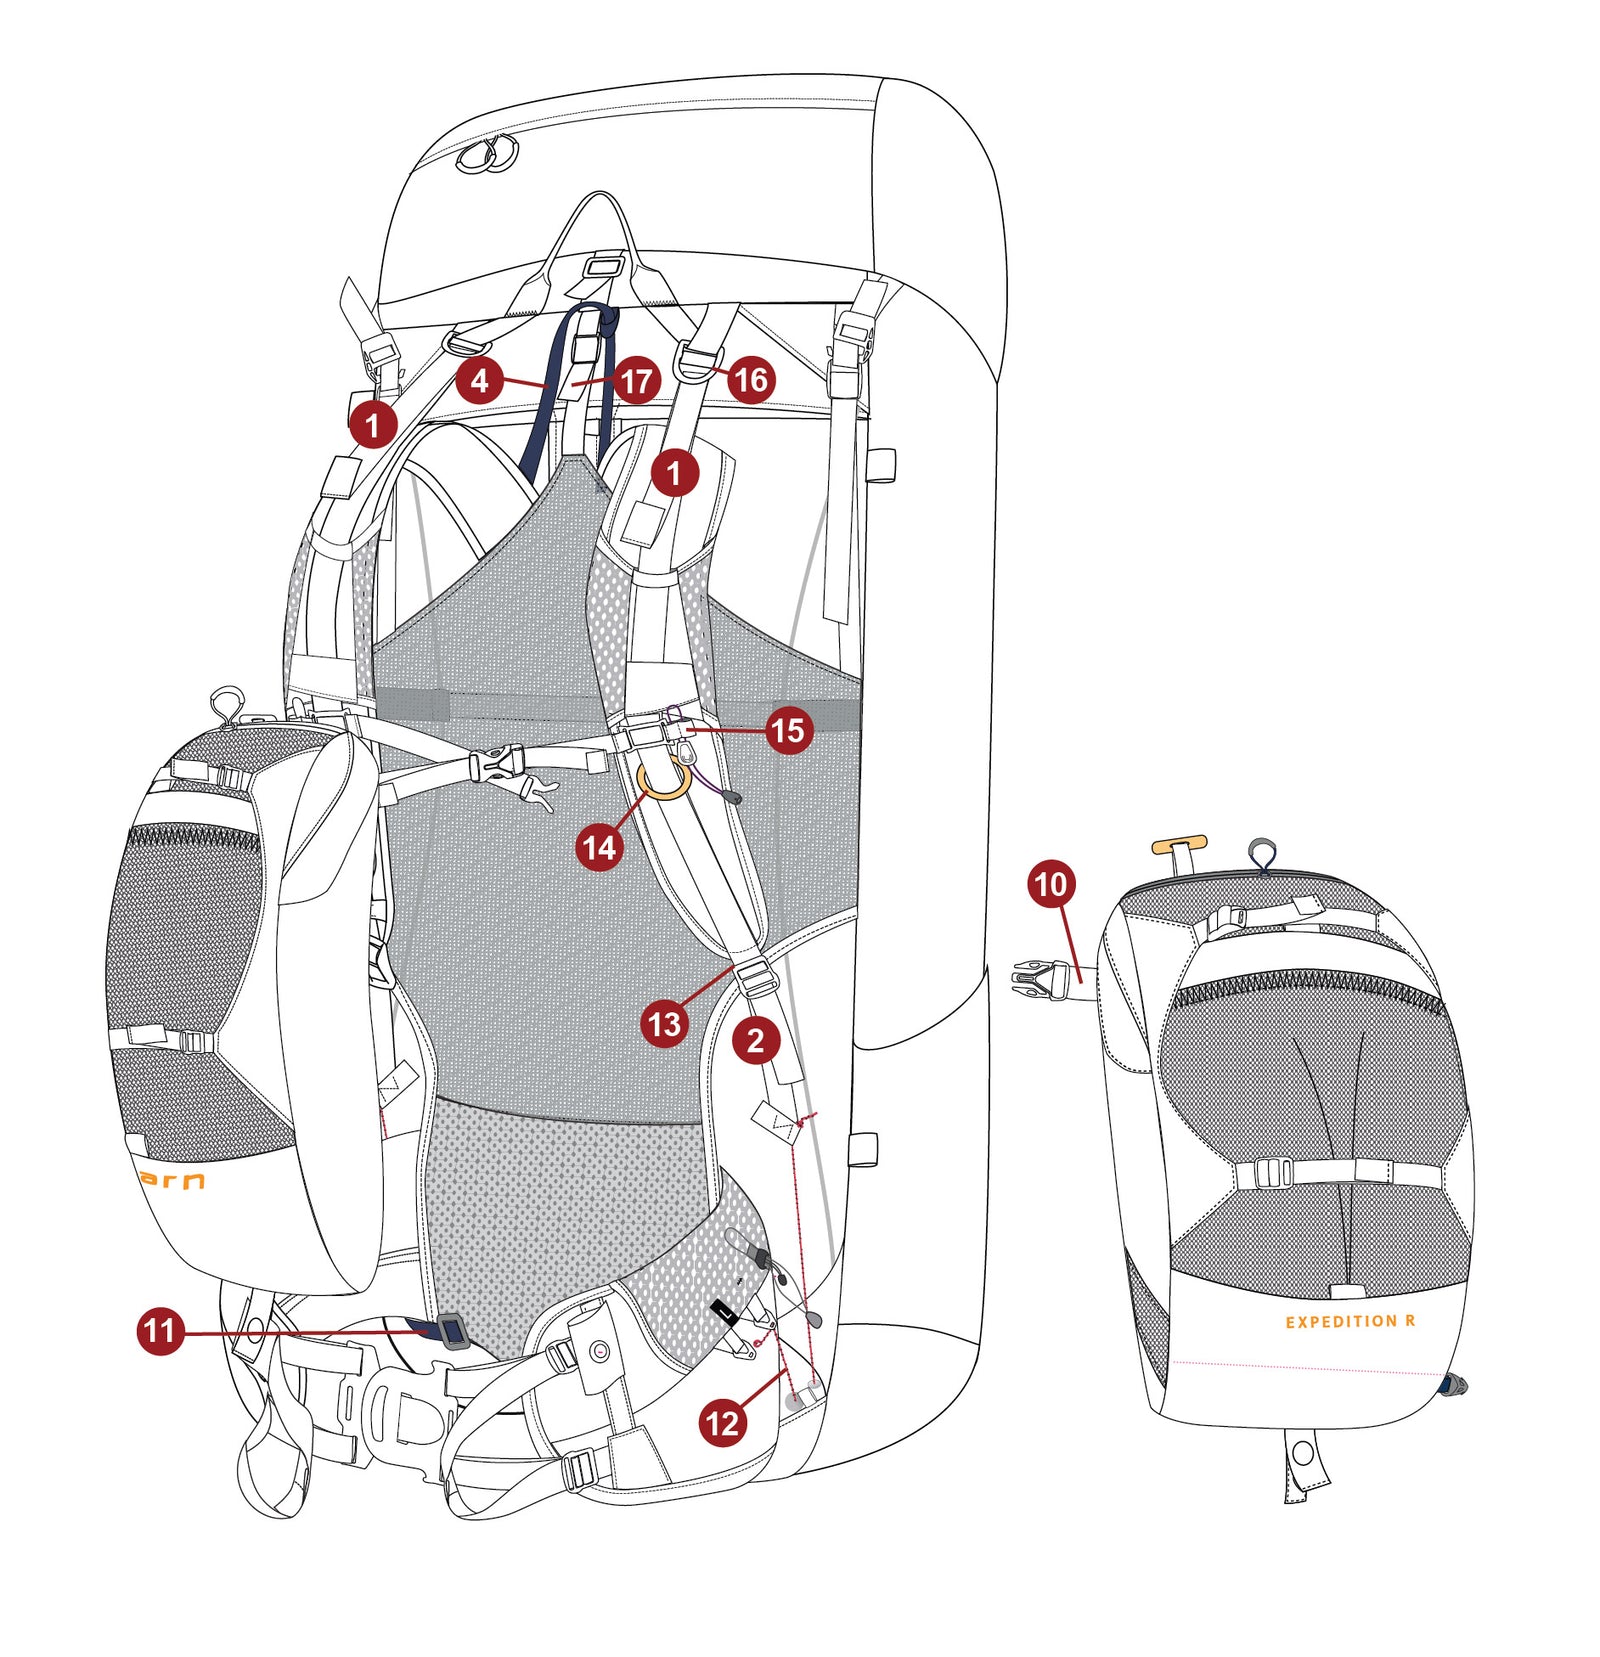
2. Loosen shoulder strap webs (1 & 2) and hip belt webs (3). Lengthen back length by pulling up on the teal web (4).
3. Add about 10 kgs of weight to the pack, and put it on.
4. Place an arm underneath each Balance Pocket, then locate the center hip belt buckle (5) and clip it together. Keeping your arms underneath the Balance Pockets, lift the hip belt and Balance Pockets to the right height on your hips – the middle of the hip belt should sit on top of your iliac crest. The hip belt is at the correct height when the top of the hip belt is positioned around your waist, the middle seam of the hip belt follows on top of your hips (your iliac crest), and the bottom of the hip belt wraps around the top of your hips. Positioning the hip belt at the right height is the foundation for a correct fit. Once correctly positioned, tighten the hip belt by pulling the ends of the loops (6) towards your belly button. You can fine-tune the shaping of the hip belt by adjusting the tension of the top & bottom straps differently (3).
5. Clip the right buckle-on sternum strap (7) into the buckle on the left Balance Pocket (8), and the left buckle-on sternum strap buckle (9) into the buckle (10) on the right Balance Pocket. The straps should cross in an X configuration.
6. Tighten the front shoulder straps webs (2) so that the part with more cushioning falls onto your clavicle.
7. Tighten the top stabilizer straps (1) just enough to bring the top of the pack close to your back.

8. Pull down the teal back length strap (11) to snug the shoulder straps into the back of your shoulders. Over-tightening will increase the weight on the shoulders and decrease the weight on the hips.
9. Tightening the hip belt U-Flow cord (12) brings more weight onto the front of the hip belt. It will also prevent the hip belt from moving freely. Give it a try and see how you prefer to have it. Adjust the tension so that there is an even load on the front and back of the hip belt.
10. When the Balance Pockets are attached, the O-rings (14) should be in the middle of the web, between the sternum adjuster (15) and the lower shoulder strap buckles (13). This allows all the weight in the Balance Pockets to be transferred to the hips and provides freedom of shoulder movement.
If the O-rings (14) are next to the buckle (13), that mean that the shoulder straps are not in the right position. Move the shoulder straps forward over your shoulders, by tightening the shoulder straps' webs (2), pulling up on the teal web (11) at the top of the back panel, and readjusting the top stabilizer webs (1).
If the O-rings (14) are up against the sternum adjuster (15) in their highest position, move the shoulder straps backward over your shoulders by loosening top stabilizer webs (1) at buckles (16) and the shoulder straps' webs (2), then pulling down the teal webbing at the bottom of the pack. Once the O-rings are correctly placed, tighten again the lower straps web (2) and re-adjust the top stabilizer straps (1).
11. To increase the gap between your back and the back of the pack, tighten the back panel by tightening the top tension straps (17).

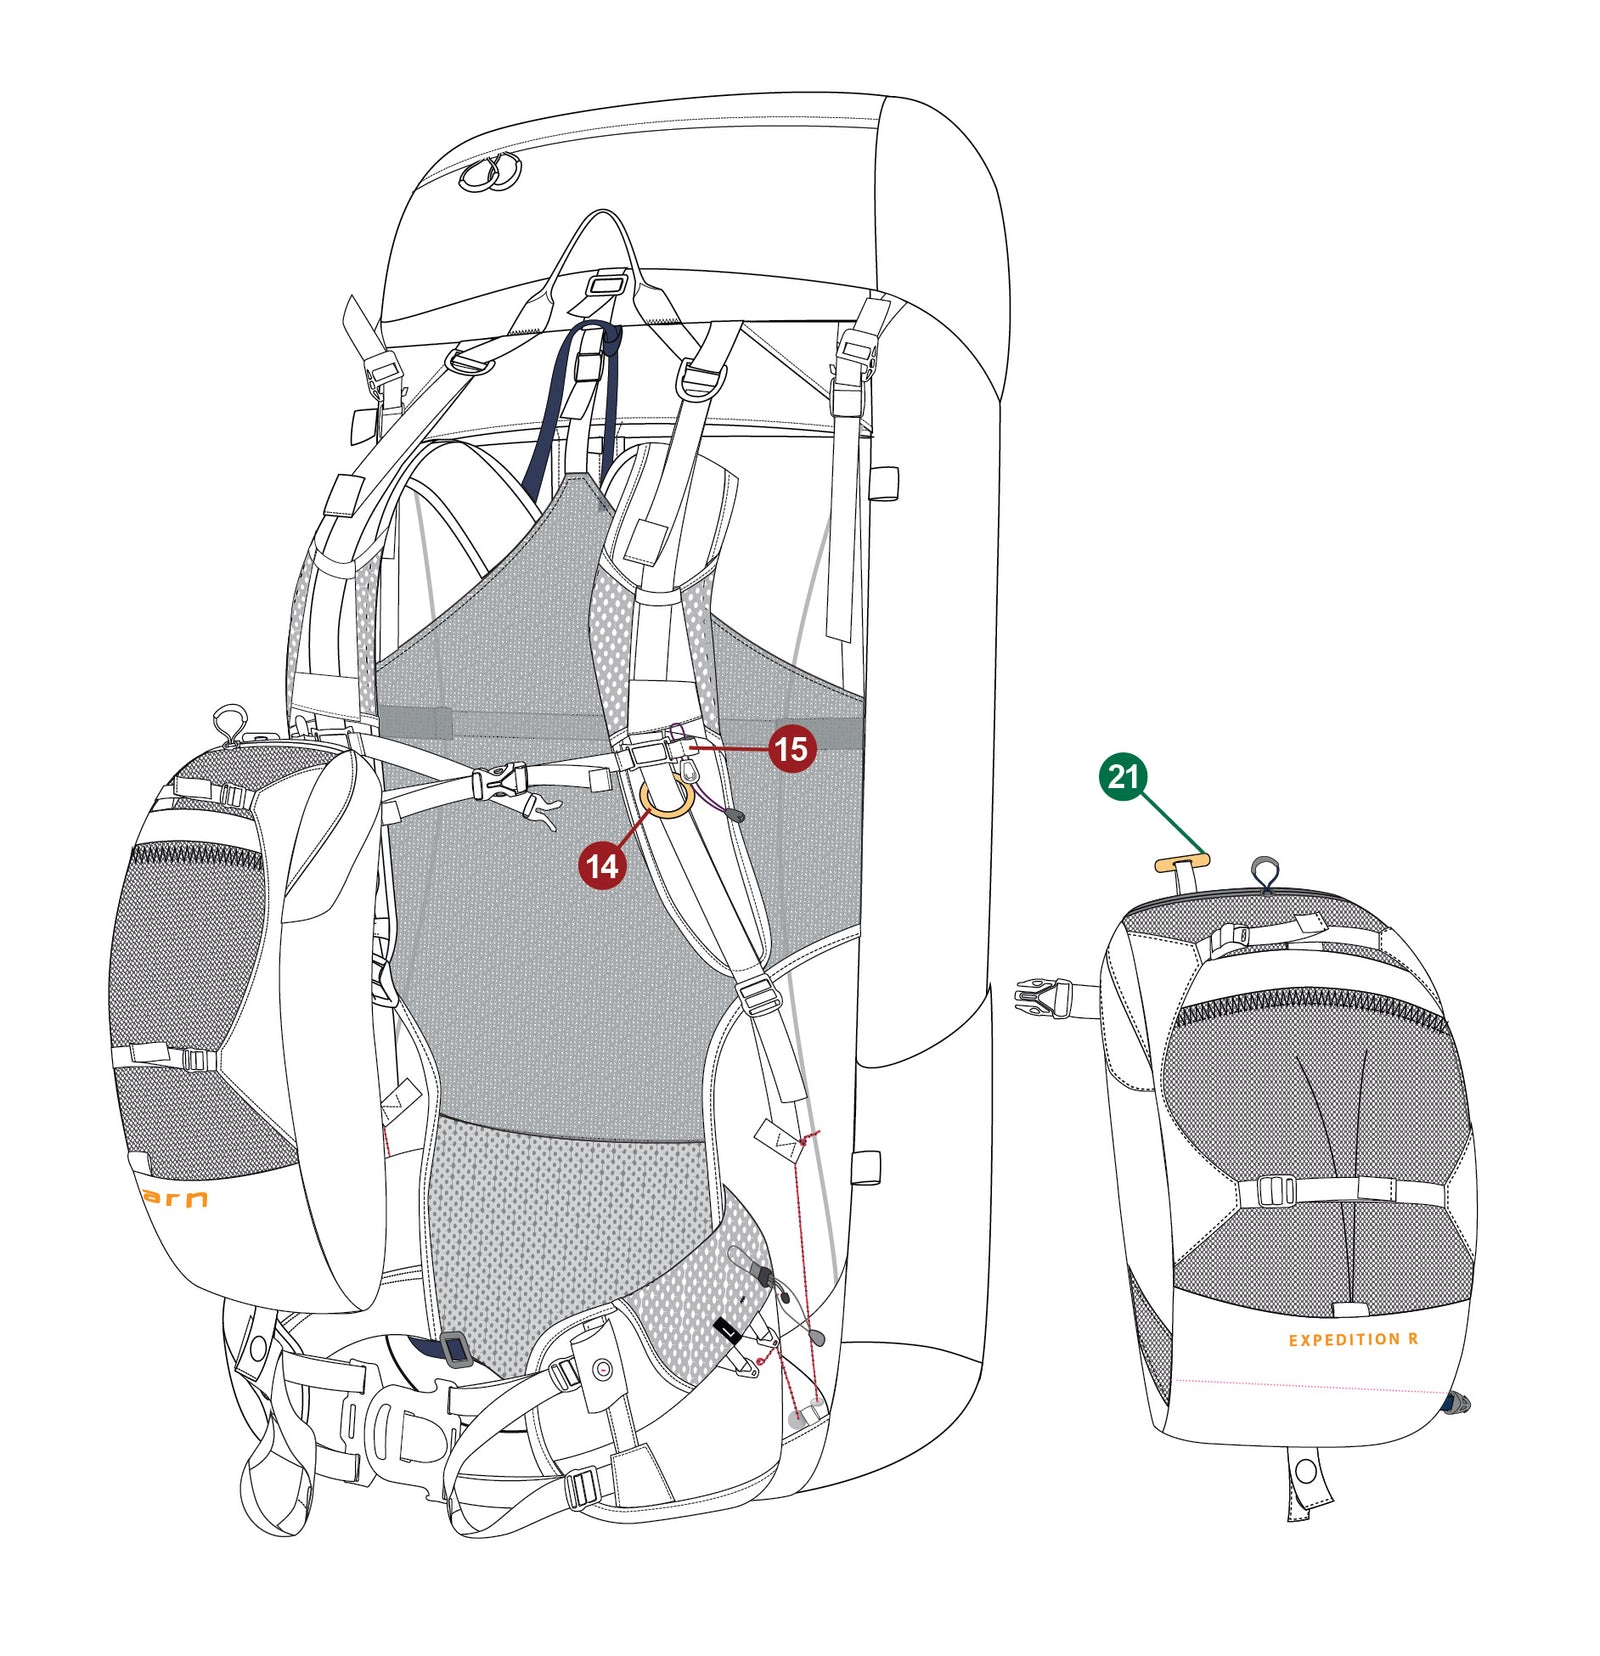
1. Slide the sternum adjustors (15) to the top of the 20 mm webs.
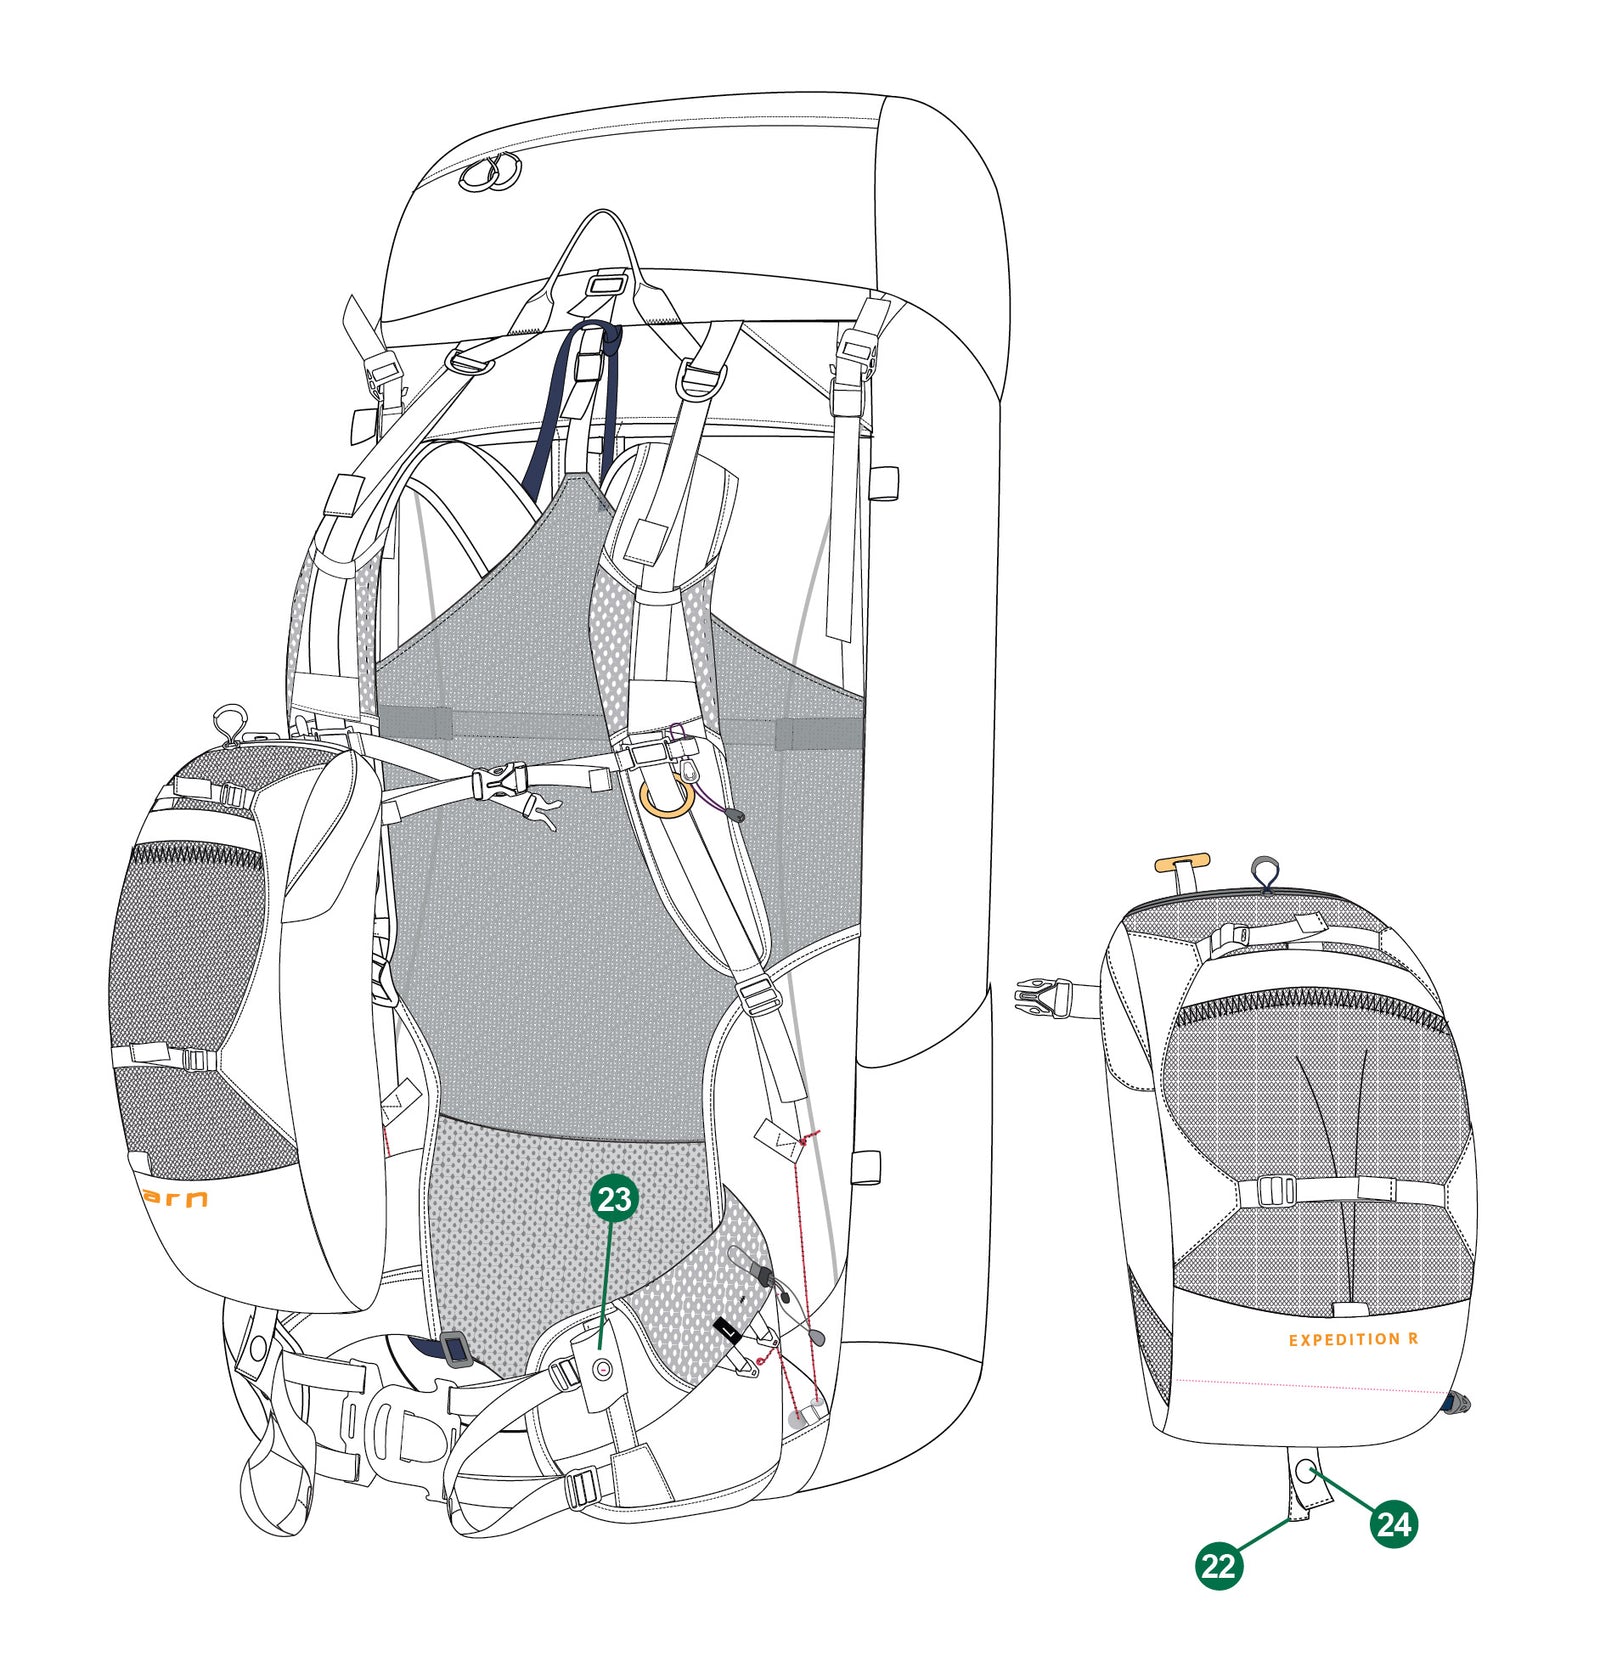
2. Slip the frame extension (22) at the bottom of each Balance Pocket into the corresponding hip belt holster (23). Close the press stud (24) to lock it in place. This will transfer the load onto the hip belt.
3. Slip the toggle (21) at the top of the Balance Pocket onto the O-Ring (14) below the sternum adjuster. The O-rings will free-slide up or down the shoulder straps so the shoulders bear no load from the pockets.
4. Check that the gap at the top of the Balance Pockets allows good visibility of the feet. Toggle (21) has alternative web loops to adjust for different size chests.

5. Attach the elastic red toggle from the hip belt to the hook at the bottom of the Balance pockets. You can choose not to attach the red elastic to the pockets so that the pockets are a bit looser. Attaching them helps creating a gap between them so that you can see your feet as you walk.
Note: Shoulder straps can be worn more loosely than a backpack (eliminating back and shoulder strain) so that more of the load is transferred onto the hips.
Pack Frame
Most models have Auto-mould frames, so custom bending of frames is rarely needed. There are some less common back shapes where it may be advantageous to increase or decrease the bend in the side perimeter frame at the height of the lower horizontal frame, as follows.
1. If there is too much pressure across the small of your back, first increase the tension on the back panel by tightening the top tension straps. If this does not solve the problem, you could slightly decrease the convex bend in the frame at the height of the top of the hip belt (20).
2. If there is pressure at the base of the back panel on your sacrum area, you could slightly increase the convex bend at (20).
Balance Pocket Frame
Balance Pockets are made so that they do not touch your chest. The wireframes can be bent further to fit all body types and sizes and to create airflow.